How to perfect your lipstick | Pictorial

Imagen
 Sometimes just chucking on a lipstick isn't going to cut it, especially with some formulas that like to make their way over your face, or does that just happen to me? I've found that applying my lipstick this way, using different lip liners & doing it in different layers helps it to stay put & last a lot longer, too. This is not something that I do everyday but when I have time & I'm wearing a bolder lip colour I like to spend a bit more on the lips. 1. Line just outside of your natural lip line with a lip liner that is close to your natural colour if you prefer a fuller lip. Tip: If you're going for a nude lip, use a colour slightly darker than your lipstick. 2. Apply your lipstick of choice. It doesn't matter if you don't cover up the liner completely as we'll be going over that again. Make sure to really press your lips together to work the lipstick in. Tip: Use a lip brush with the first coat which helps the lipstic

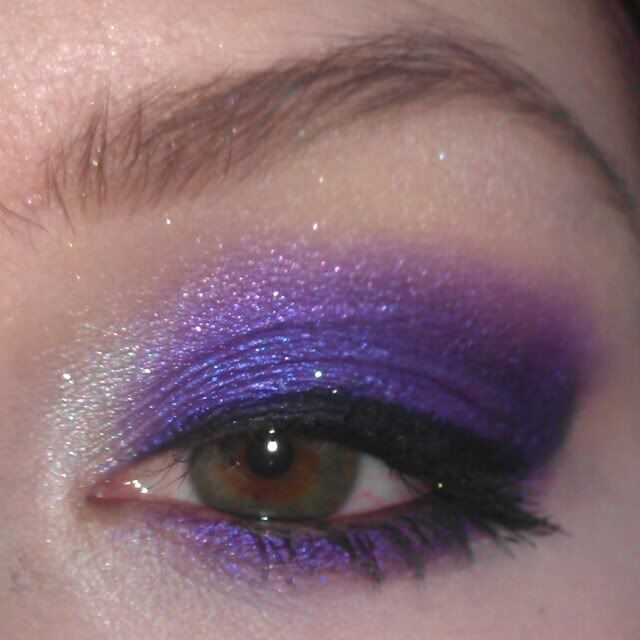
How to Purple Smokey Eye & FOTD

Are you ready to see the most beautiful purple ever!?
I wanted to pair my beeautiful inglot shadow with maybelline's color tattoo in painted purple, since they paired up lol :P I also wanted to show you how badly it (color tattoo) applies :(
So since I haven't done one in a while I thought I may as well do a step by step yayyy. Hope you like!


~Eye Products used~
Maybelline Color Tattoo in Painted Purple // Inglot E/S #439 // Sugarpill E/S in Hysterics // Random matte skin colour e/s  // Sleek Bad Girl- black, purple. // BYS gel eyeliner // Bourjois curling mascara //Max Factor false lash effect


 1. After priming your lids, apply your base, I used Maybelline Color Tattoo in Painted Purple. (mehh hardly showed up! This is why it's just a base ;))
 2. Pat your fave purple eyeshadow onto the lid. This is Inglot E/S #439 that has a slight bluish tint to it.
 3. Blend the edge using windshield wiper motions.
4. Apply Hysterics to the crease.
 5. Soften the edges by blending with a skin coloured eyeshadow.
 6. Add some black in the outer V
 7. Blend using the darker purple.
8. Apply your highlight to the browbone & inner corner. & Add shadow to the lower lashline, I simply used the 439.
 9. Do your eyeliner & line the waterline.
 10. Add mascara..

11. ...Define your brows and you're done :D

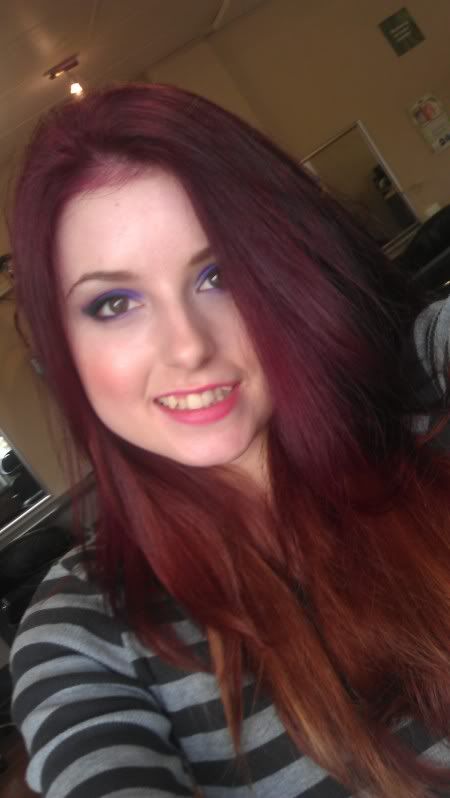
And what I wore on the rest of my face..


Cheeks: Milani Luminoso (I don't know why it looks too orange on me :[)
Lips: Revlon Matte L/S in Pink About It

Edited to add a phone pic:

Annd I got my hair dyed again, pulled my base colour through the top layers to break up some of the lightness & put a gloss tint over the balayage so hopefully it doesn't feel so damaged!


Thanks so much for looking, I hope you like it!

Entradas populares de este blog

More Christmas... Makeup & Nails

Stila After Glow Lip Colours | Review & Swatches

Mario Badescu Hyaluronic Moisturizer